Harmonizing Colors Across Institutions: An Introduction to Vahadane Stain Normalization in Digital Pathology
Staining variability across different institutions hinders the generalization of deep-learning models in digital pathology. In this mini-review, I will introduce the Vahadane normalization to minimize the staining difference. The original paper is “Structure-Preserving Color Normalization and Sparse Stain Separation for Histological Images” by Vahadane A et al. [1].
A simple explanation of technicality
Herein, I describe how Vahadane stain normalization works without going into mathematical details. For those, you are referred to the original paper. For that, you are referred to the original paper. This technique concerns 2 aspects of the staining differences: stain variation by the staining protocols and color variation by the scanners. To take the stain variation into account, the author used the stain separation technique because the final color appearance that we see is a mixture of color variation and stain variation.
Step 1: Stain Separation. An algorithm (not described here) estimates the proportion of each stain (Haematoxylin and Eosin) within a pixel, or the density map, and the “color basis”, or color appearance, of each stain. The color appearance of a stain tells us how this stain contributes to the RGB colors to the visual appearance. The density map shows how much intensity each stain is in a given location (each pixel).
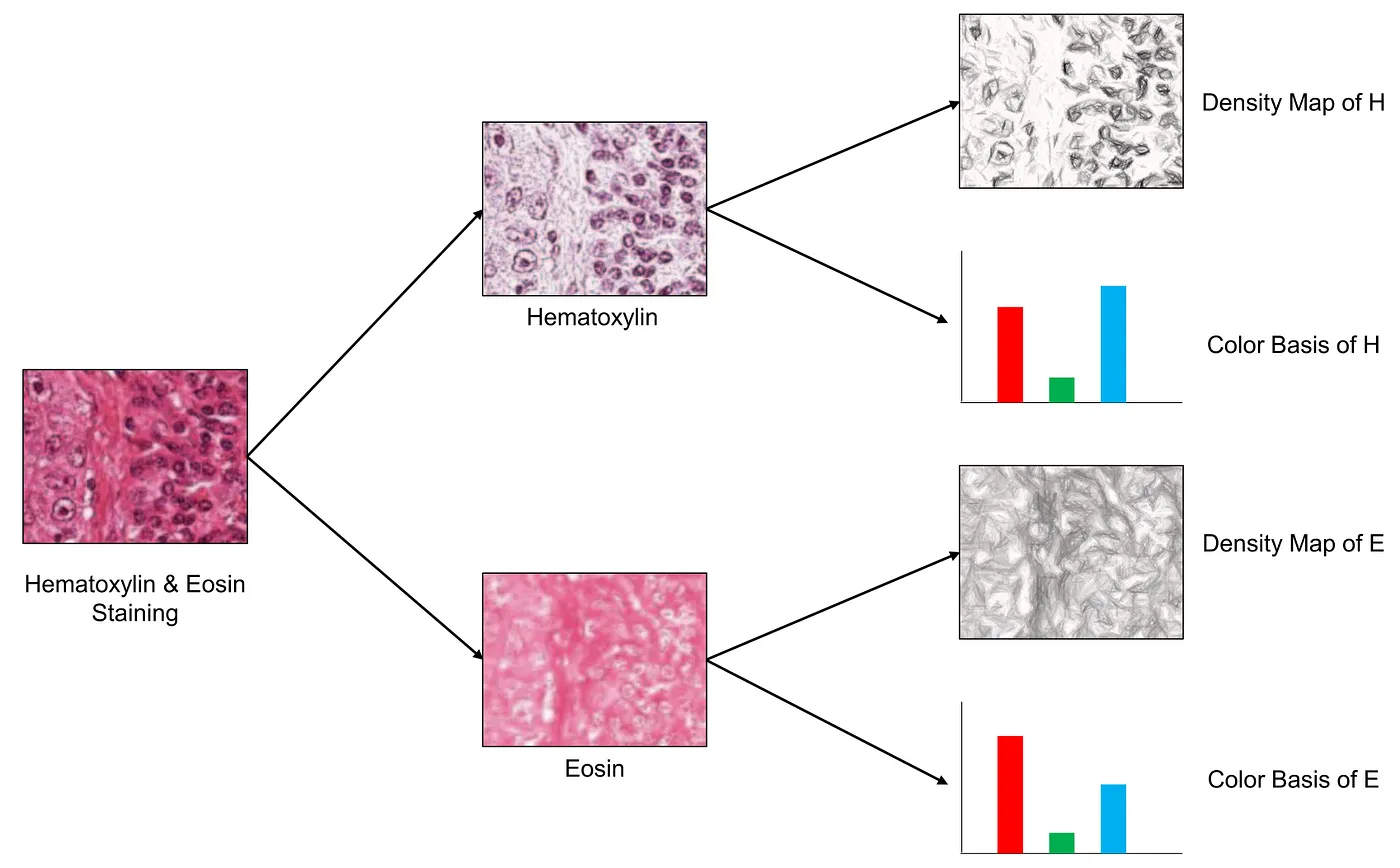 The idea of the stain separation process. Image modified from [1].
Step 2: Structure-Preserving Color Normalization.
- We employ 2 images (1st image: source image — s, 2nd image: target image — t). The source image is the image we want to normalize and the target image is the one whose staining protocol we would like to “capture”.
- We separate the stain (step 1) of the 2 images to get 2 density maps and 2 color appearances
- The density map of the source combines with the color appearance of the target. This gives us the normalized source image.
- Finally, we normalize the color appearance of the created normalized source image to get the final result.
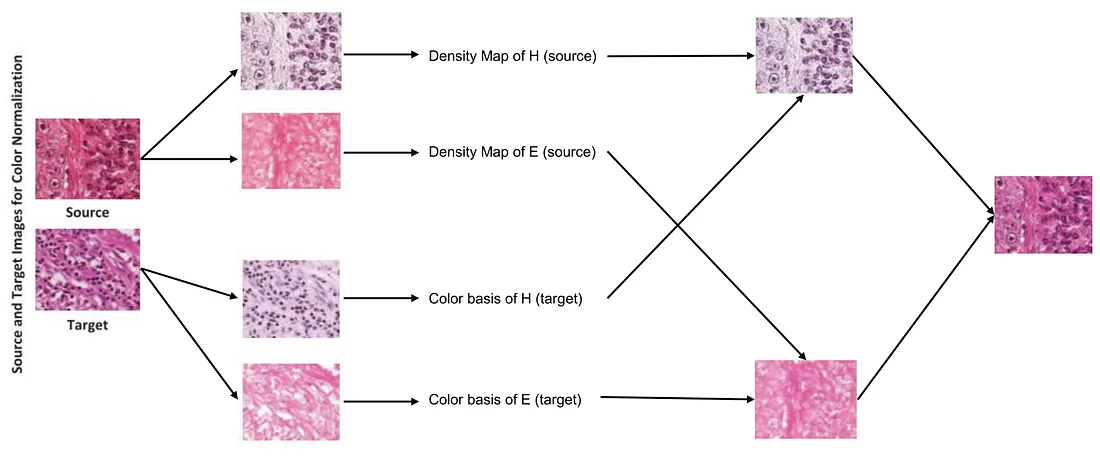 The idea of Structure-Preserving Color Normalization. Image modified from [1].
Examples
In this part, I will present a few examples of how well this technique works by showing the normalized image.
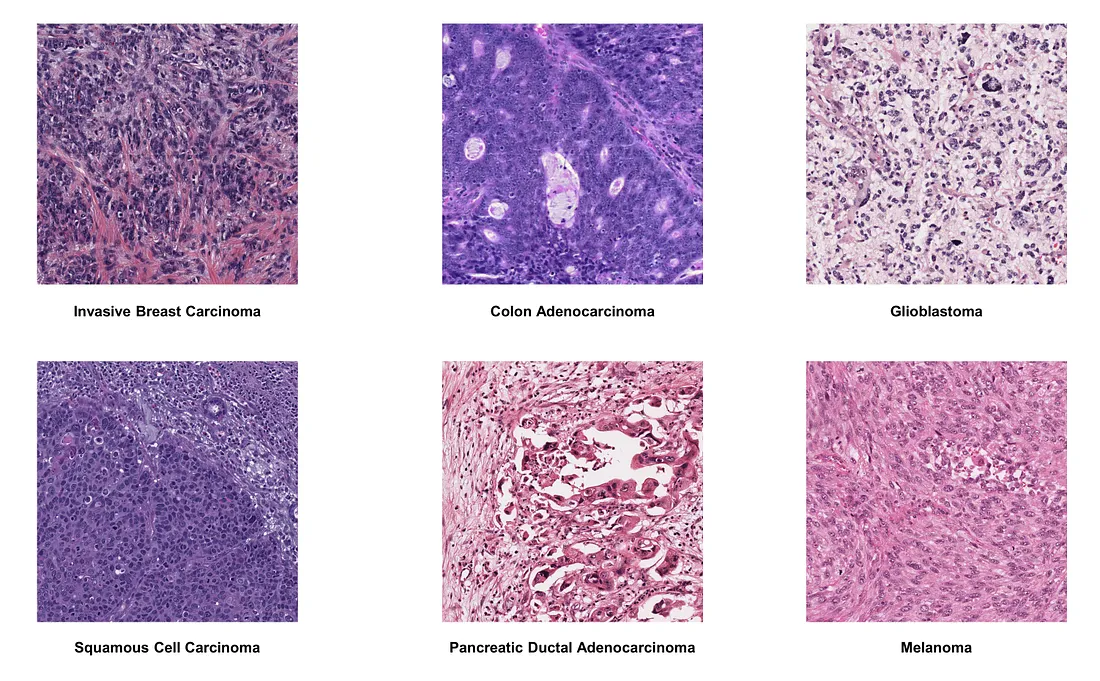
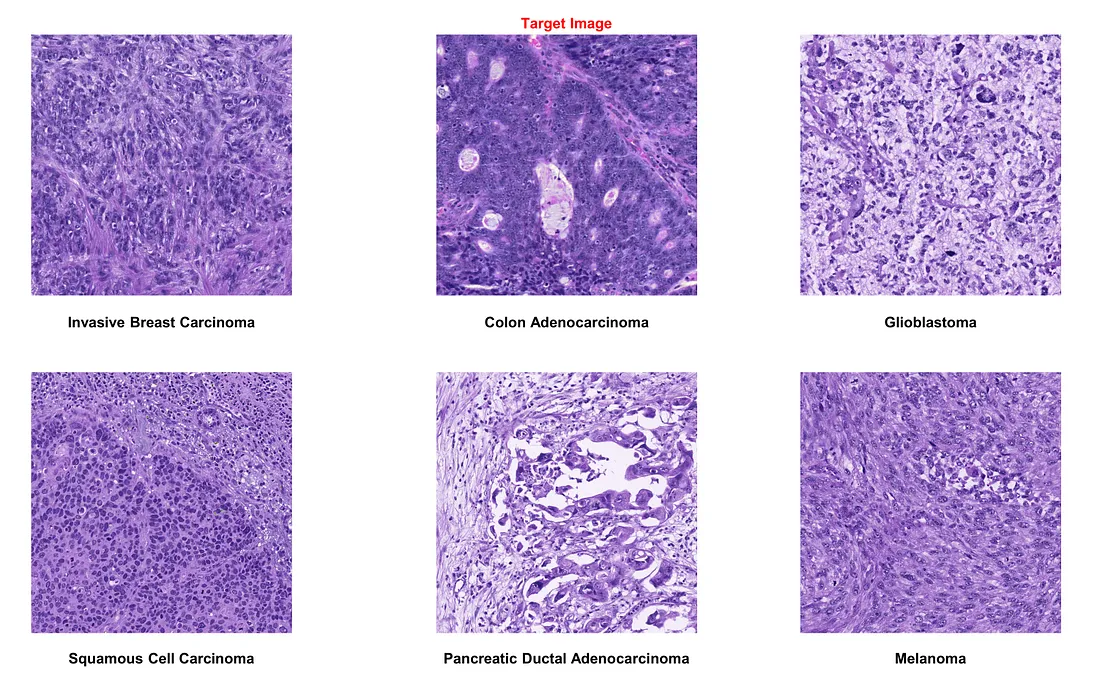
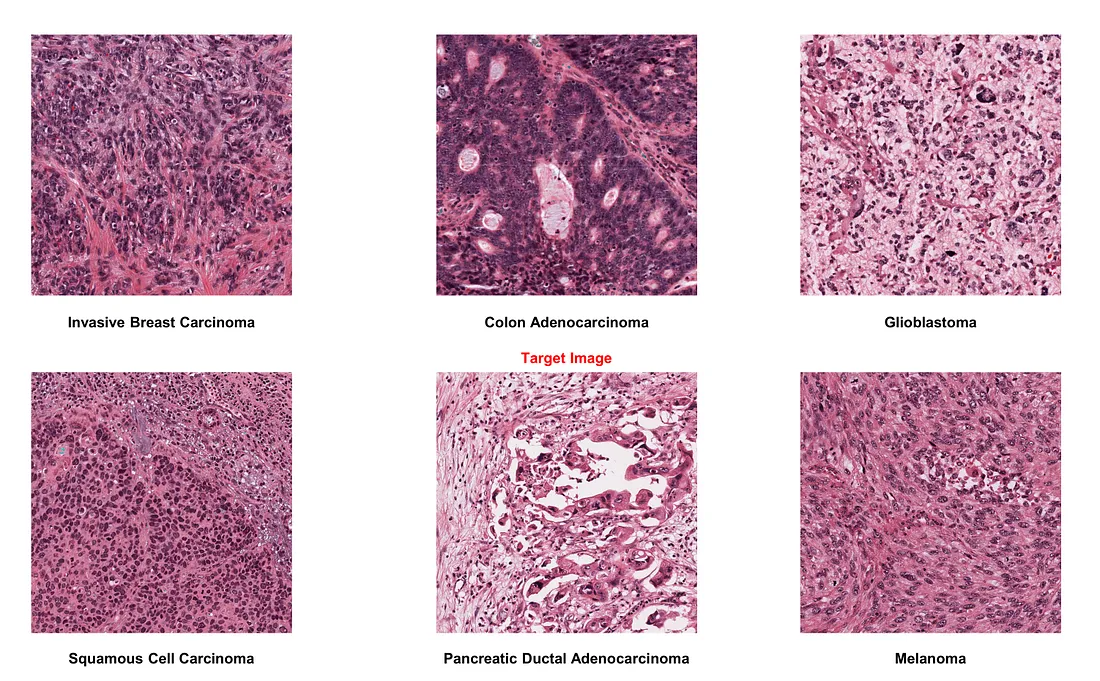
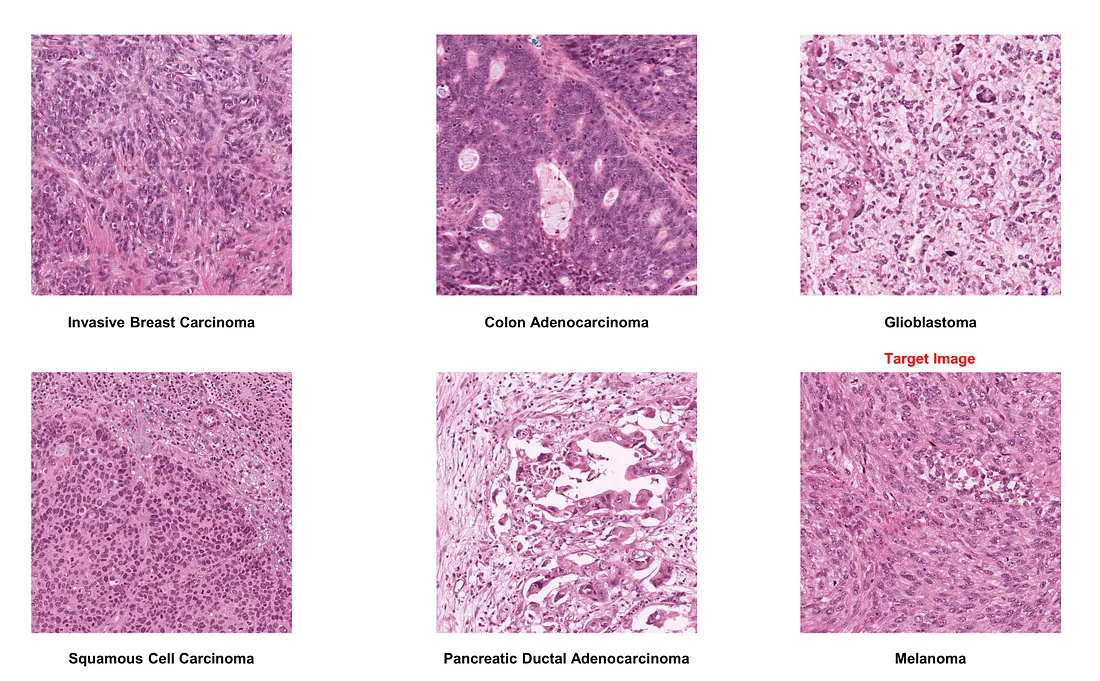
Here is the original version of some histologic images of interest:
If we choose invasive breast carcinoma as the target image:
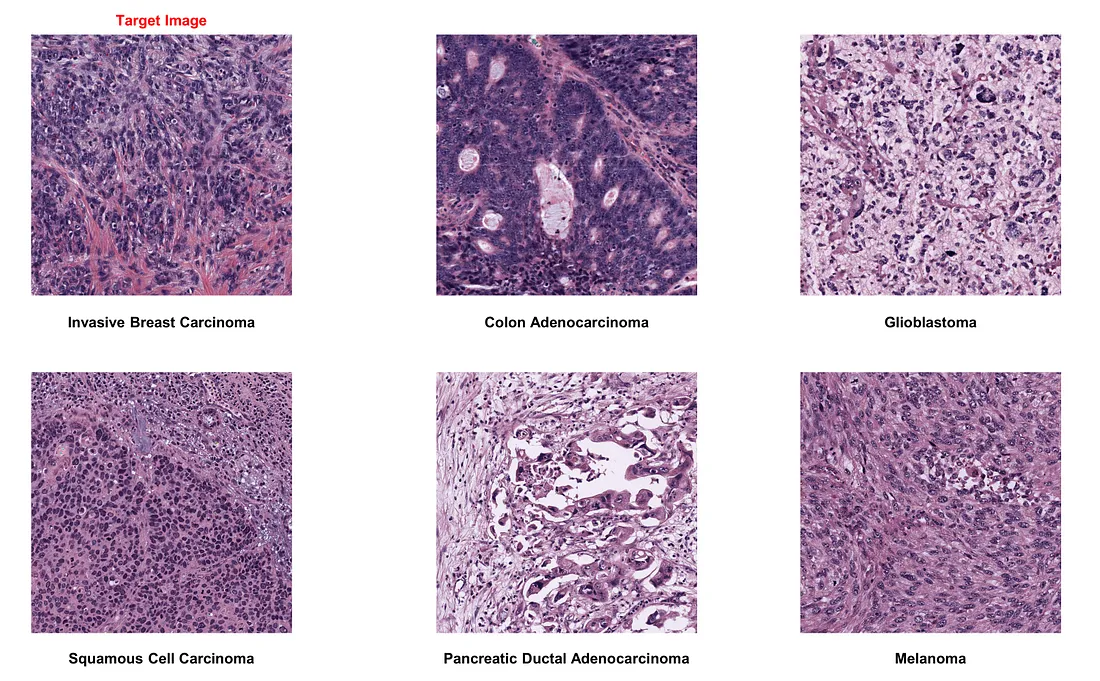
If we choose colon adenocarcinoma as the target image:
If we choose glioblastoma as the target image:

If we choose squamous cell carcinoma as the target image:

If we choose pancreatic ductal adenocarcinoma as the target image:
If we choose melanoma as the target image:
Comments on the example
- Color normalization generally performs well, proving beneficial amidst significant staining protocol variability.
- However, in the case of squamous cell carcinoma images, the technique may not always be accurate. It erases nuclear patterns and oddly highlights collagen bundles in purple, mimicking the original stain. Therefore, manual inspection of normalized images is crucial to maintain quality.
Conclusion
Vahadane stain normalization is a useful technique to add to the toolkit of digital pathology. However, manual inspection should be done to make sure it works properly.
To those who may be interested, I hope you enjoy this mini-review.
Reference
- Vahadane, Abhishek, et al. “Structure-Preserving Color Normalization and Sparse Stain Separation for Histological Images.” IEEE Transactions on Medical Imaging, vol. 35, no. 8, Aug. 2016, pp. 1962–1971, https://doi.org/10.1109/tmi.2016.2529665.